Because did you see that new UK surveillance law?
- Why you should use a VPN
- Why you would want to set up your own VPN
- Why you would not want to set up your own VPN
- Before we start
- Step one: set up your Mac
- Step two: buy a server on Vultr
- Step three: let Streisand set up all sorts of anti-censorship software for you
- Step four: Actually use your VPN
Why you should use a VPN
For people with uncensored internet access, it’s for your privacy’s sake. Browsing the internet with a VPN connection prevents your ISP from snooping on your data and throttling it, secures your connections to non-https websites when using a public Wi-Fi, and makes government surveillance harder.
For people in countries with limited internet freedom (for example, China and Turkey), I trust you to already recognise the importance of having a VPN.
Why you would want to set up your own VPN as opposed to just paying for a service like Private Internet Access, AirVPN… etc
- It’s a lot cheaper. Vultr’s (the VPS provider that we’re going to be using) cheapest server is $2.5/month while most other ready-made VPN services cost at least $5/month (at least as far as I know, and please don’t use free VPNs where you are the product).
- It’s fun to set up your own VPN.
- Because it’s your server, you don’t have to keep logs. Please don’t believe any VPN service’s claim that they don’t keep any logs. If they don’t, how would they be able to offer different plans (for instance $6/mo for 5 devices, $10 for unlimited devices… etc)? How would they be able to ban abusers?
Why you would not want to set up your own VPN
- You only have access to one IP address for one server. In other words, if you set up a server in Berlin, you can only connect to this IP address in Berlin. You can’t choose from a myriad of locations like you can a traditional VPN service unless you set up multiple servers.
- It may not be fun for you to set up your own VPN.
Before we start
In this guide, I will assume you are working on a Mac and have a text editor like TextWrangler or Atom (the built-in TextEdit is fine too). I will also assume you are at least a little familiar with Terminal and what shell commands are.
For people who are comfortable with Terminal/bash, I don’t think you need my guide because Streisand’s documentations are already very clear. All explanations will be aimed at approximately the level of technology proficiency of my parents. In other words, explanations will be as simplistic as I can make them at the expense of accuracy.
Step one: set up your Mac
Skip any step that you have already completed before. All the typing is done in Terminal in your home directory (e.g. /Users/your-pretty-name, when you open your Terminal that’s where you are).
- Install Homebrew. Follow the installation instructions in that link. Think of Homebrew as an AppStore in your Terminal, e.g. you can install stuff by typing “brew install <stuff>”. We need this because we will use Homebrew to install most of the other stuff we need.
-
Install git by typing
brew install gitGit is a version control system for developers (for more details, read this article). We need it because we will use it to install other people’s code, like Streisand.
-
Install pip by typing
   sudo easy_install pip
   sudo pip install pycurl
Pip is a package management system for Python, a general-purpose scripting language. We need it for Streisand. Also in this step you will be prompted to enter your passcode (the one you used to unlock your Mac) because we need elevated privileges to install pip.
-
Install Ansible by typing
brew install ansibleAnsible is an automation tool for remote servers. We need it for Streisand.
-
Generate an SSH key pair. An SSH key pair is like a pair of usernames and passwords but for identifying your Terminal to other services. The SSH key pair consists of a private key and a public key.
ssh-keygen -t rsa -b 4096 -C “your_email@example.com"The email is for labelling this key pair. And then you’ll be prompted to enter a file to save the key, just press enter. Lastly it will ask you for a passphrase, please remember this passphrase.
This command adds the SSH key you just generated into your SSH key manager so that your Terminal will automatically use this key.ssh-add -K ~/.ssh/id_rsa
Step two: buy a server on Vultr
What is Vultr?
It is a VPS (virtual private server, think of it as a computer you can use but physically it’s in someone else’s basement) provider.
Why Vultr instead of other providers?
Because it’s cheap and has nice performance. For detailed comparisons against other providers, see this article.
Instructions
- Register a Vultr account (or if you want to make my day, feel free to use my referral link ❤️)
-
Deploy a new server. You’ll be greeted with a delightfully designed page looking like this (seriously, I’m loving the choice of Raleway font, the gradients, and the subtle box shadow).
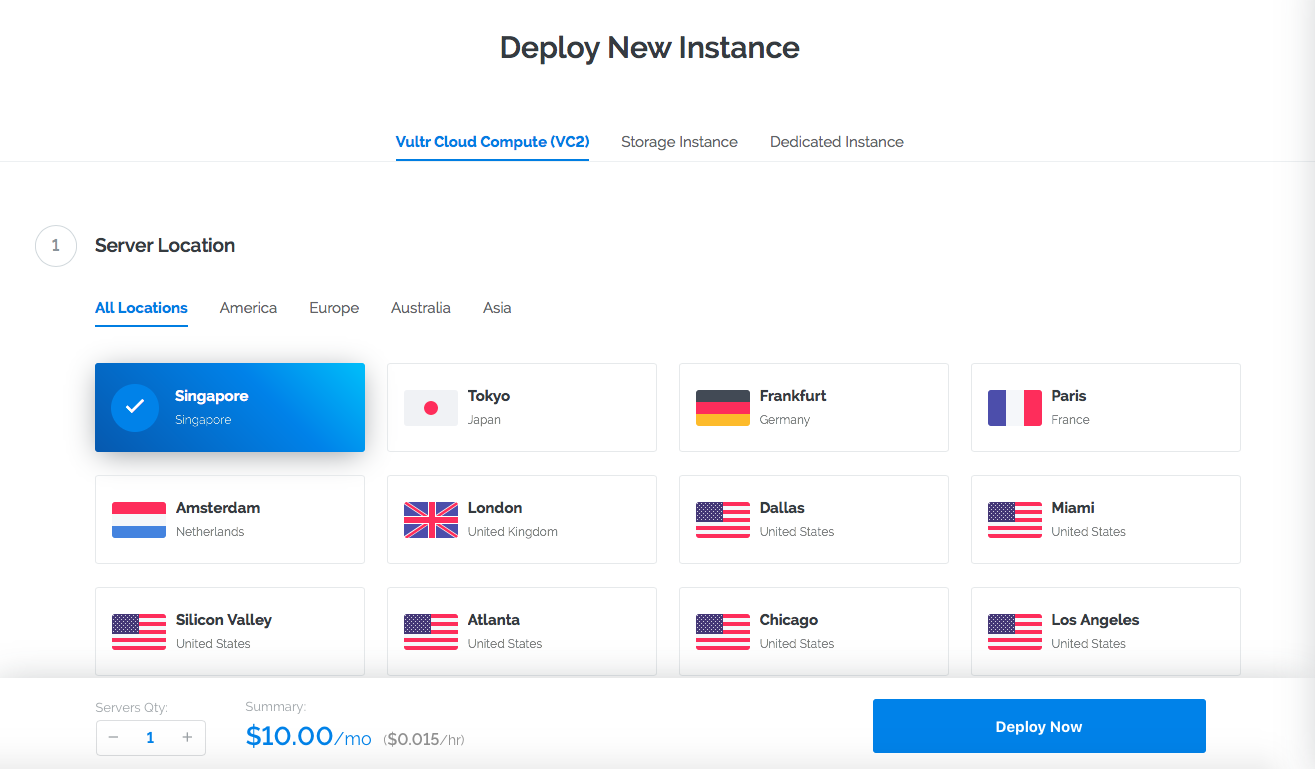
Server location: You will obtain an IP address in this location.
Server type: Choose Ubuntu 16.04 because that’s what Streisand (the script that’s going to set up the actual VPN for us) wants.
Server size: If you’re the only one using the VPN, I believe the smallest server (the $2.5/mo one) will be enough for you. You can always upgrade your server later. So I recommend starting from a $2.5/mo or a $5/mo server.
Skip additional features and startup scripts.
SSH keys: Now is the time to use that cool SSH key pair you generated.
   cd ~/.ssh   # to get into that folder you stored your SSH key in
   cat id_rsa.pub  # to print your public key
Now copy the entire contents of what was just printed and paste it into the box that appears after clicking “add new” button and give it a name (maybe the name of your Mac).
Server hostname & label: Baptise your server with a pretty name. Mine is called Minerva. Minerva the VPN server!
- You will have to wait for a few minutes during the birth of your new server.
- After the birthing process is complete, your server will now appear in the Servers tab.
-
Copy the IP address of your server and put that somewhere because we will need it soon.
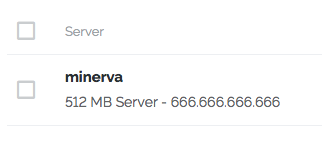
Yours will not be 666.666.666.666. That is just for demonstration purpose.
Step three: let Streisand set up all sorts of anti-censorship software for you
What is Streisand?
Streisand is a set of scripts that Joshua Lund wrote to help people fight censorship by automating the process of setting up VPNs and various other softwares in your own server.
Instructions
- Get into your home directory
cd ~Or any other folder, really.
-
Use git to download Streisand and get into its folder
git clone https://github.com/jlund/streisand.git && cd streisand -
And then use your text editor to open the file “inventory”. For Atom, the command is
atom inventoryOr you can just type
nano inventoryif you like it this way.
- Delete the “#” on the first line of [streisand-host] that you see.
- Delete the “#” on the next line after [streisand-host].
-
Replace “255.255.255.255” with the IP address of your own server. Now these two lines look like this:
[streisand-host] 666.666.666.666 # put your server ip instead - Save the file.
- Start Streisand by typing
ansible-playbook playbooks/streisand.yml - Wait for it to execute. It took me around 20 minutes, so be patient.
Step four: Actually use your VPN
After Streisand has done its job, a new folder called “generated-docs” will appear! Inside this folder, open your-server-name.html file in your favorite browser and you should see the instructions for accessing your own Streisand Gateway (which is a page hosted on your server that explains how to use the different kinds of VPN Streisand installed for you). Follow them.
I recommend that you use L2TP/IPsec for iOs because iOs has native support for it and you don’t have to install the freaking ugly OpenVPN Connect app for it.
For macOs I recommend OpenVPN.
Congrats
Congrats on setting up your own VPN! I am proud of you. Have a cup of tea 🍵!